Analysis
How to analyse fingerprints, footwear and impression evidence in Amped FIVE

ADVERTORIAL: By AMPED software.
“Every contact leaves a trace.”
Locard’s centuries-old maxim remains the best basis for working with impression marks. When recorded properly and processed methodically, fingerprints, footwear, and tire marks can be decisive in both reconstructing the events of a crime and in comparing the traces secured at the scene with comparison material from suspects.
The same ground rules apply to various types of evidence, whether it’s a latent ridge detail on a tile, a partial shoeprint on a door panel, or tire tracks across tarmac. Capture the evidence as if the court is watching, and then process it methodically so that another expert can replicate the procedure.
Traces recovered at a crime scene often do not have the same quality as, for example, fingerprints taken during police identification procedures (ten-print records).
Latent fingerprints at crime scenes often require visualisation and may be masked by surface characteristics. Amped FIVE provides all the tools necessary to enhance fingerprint contrast and separate it from the background.
Let’s look at a few examples that go beyond standard contrast-enhancement tools such as Levels or Curves.
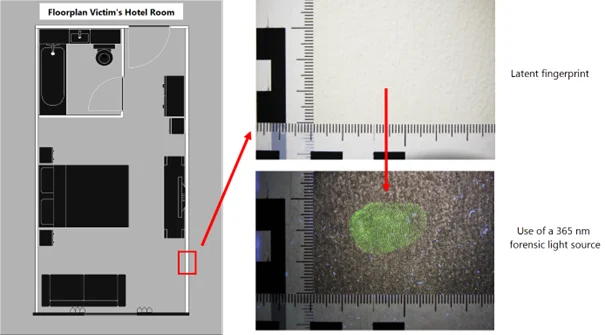
In our first example, we examine a latent fingerprint on the wall of a hotel room, made visible using a forensic light source.
Before we begin the processing workflow, it’s important to note that Amped FIVE offers powerful annotation tools. These allow you to quickly and efficiently create overviews that show the location of traces at the scene, which can be useful for an illustrated report.
Scene sketches can be combined with overview and detail photographs, along with further annotations, to provide the expert with additional information. This includes the precise position of the mark, its relationship to other traces at the scene, and the nature of the substrates from which the traces were recovered.
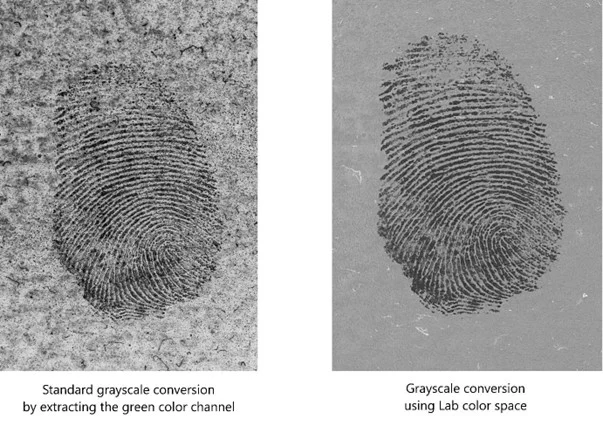
In this case, a standard way to improve the contrast of the fingermark is to isolate the green channel during the conversion to greyscale. This process increases the contrast of the green-fluorescent mark and separates it more distinctly from the background. However, in this case, a non-negligible amount of visual noise remains due to the wall’s texture. Amped FIVE also provides a quick and efficient method to perform the black-and-white conversion in the Lab colour space, which almost completely suppresses the substrate’s visual noise.
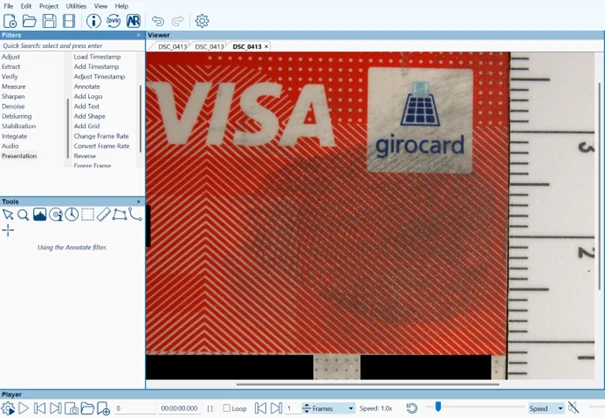
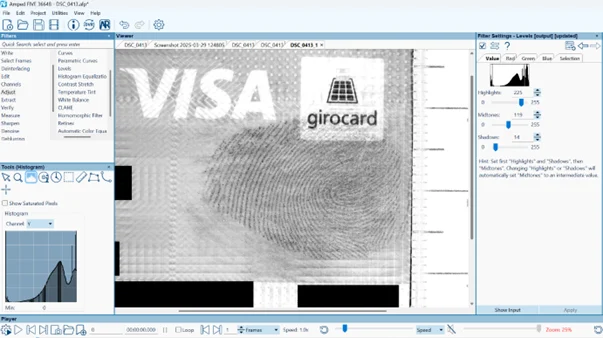
As long as there is color in either the trace or the background, or both, whether it is a fingerprint or a shoe print, these can usually be separated relatively easily by adjusting the color channels as mentioned above. Another example would be this fingerprint on a credit card, where we can quickly and efficiently eliminate the optical noise that impairs the visibility of the fingerprint by adjusting the color channels. First, the starting point:
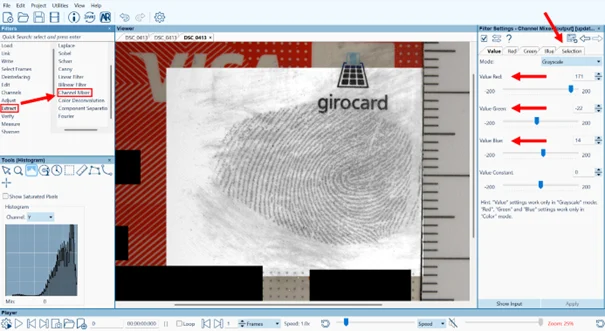
And the final result after adjusting the color channels during the black-and-white conversion:
But what should we do when both the fingerprint and the background pattern are monochrome?
Well, I’ll take the liberty of converting our original image to greyscale to simulate that scenario.
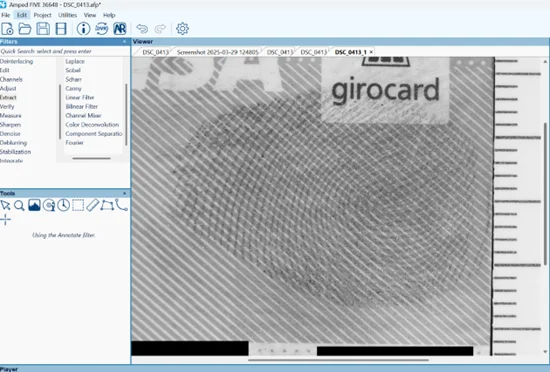
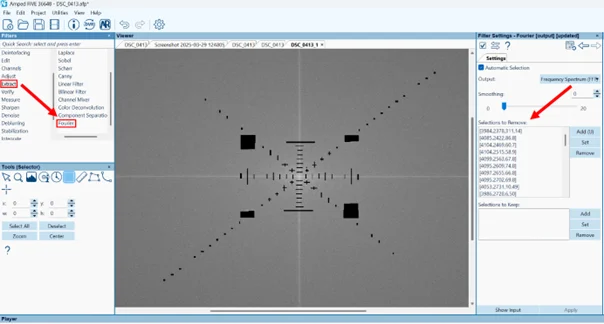
In such cases, another filter in Amped FIVE can help us: the Fourier filter.
This filter transforms our image from the pixel domain into the frequency domain.
Within the filter, we can visualize the frequency representation and suppress the components responsible for the unwanted, periodic background patterns.
After applying the Fourier filter and making a slight global contrast adjustment, we once again achieve an image in which the fingerprint stands out much more clearly from the background surface.
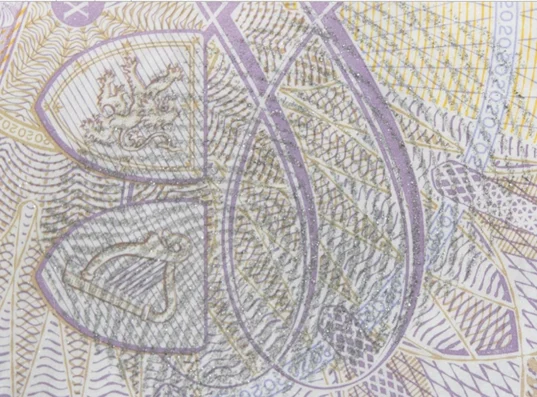
Particularly in organised crime investigations, large quantities of cash are often seized. Banknotes typically have highly irregular, complex background patterning, in which case even the Fourier filter offers little help, as in this example.
Even here, Amped FIVE provides efficient methods for isolating a latent print from complex background patterns. The only requirement is an additional photograph of a banknote of the same type, taken at the same distance and with identical framing.
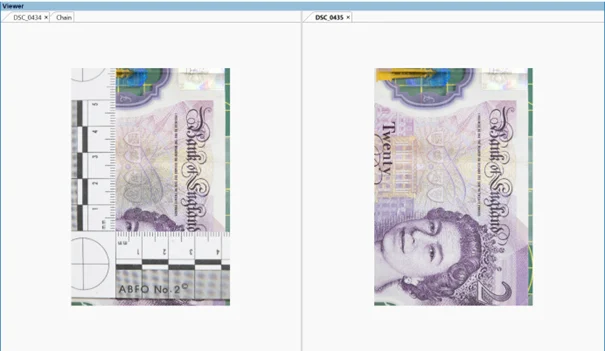
Before we can combine the two images, we first need to align them precisely using the Perspective Aligner filter in Amped FIVE.
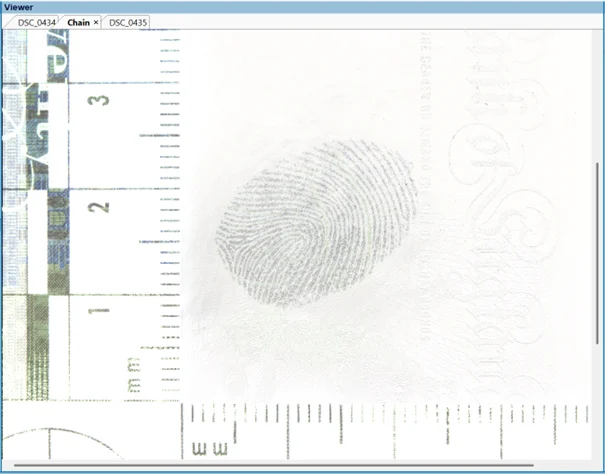
After this step, we select the mode “Difference (Second – First)” from the filter settings and invert the image, which gives us the desired result: a fingerprint that is almost completely separated from the background.
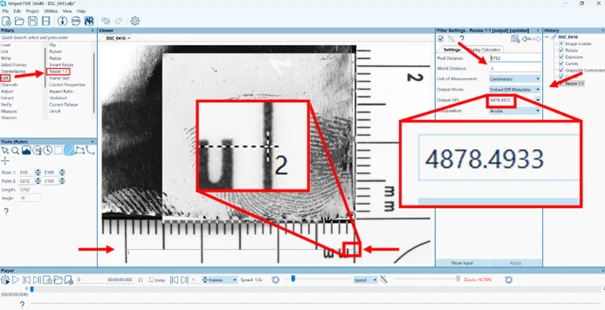
One of the most important steps in the processing of fingermarks is the 1:1 resize. This step ensures that, if the processed image is to be printed for comparison, the size of the fingermark and the printed scale exactly match the original scale and the original mark. It also serves to determine whether the image has sufficiently high resolution for comparison. An automated system such as AFIS, for example, requires a resolution of 1000 DPI.
With the update of Amped FIVE to Version 36648, the Resize 1:1 filter offers the ability to perform this conversion while preserving the original pixel count. The 1:1 conversion is performed as follows.
We open the Resize 1:1 filter from the Edit filter group and draw a long, straight line along the scale present in the image. It is important to ensure that both endpoints (Point 1 and Point 2) are placed as precisely as possible in the center of the scale markings.
Next, we enter the World Distance in the Filter Settings tab, in our case, “3 cm”.
Under Output Mode, we select “Embed DPI Metadata.”
After clicking Apply, we can see that in this example, the output DPI value is “4878.4933”, which is well above the required 1000 DPI.
If we were to print the image now, the scale on the printed image would perfectly match the real-world scale used when the photo was taken. Additionally, we would retain the full resolution and all pixels from the original image.
Same Tools, Different Trace: Processing Shoeprints and Tire Marks
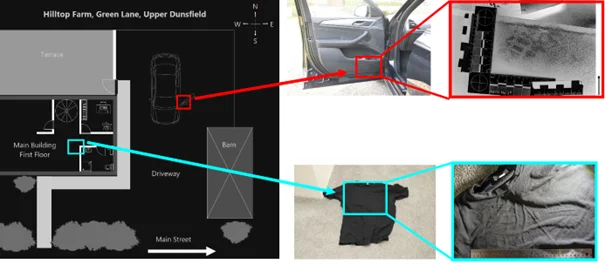
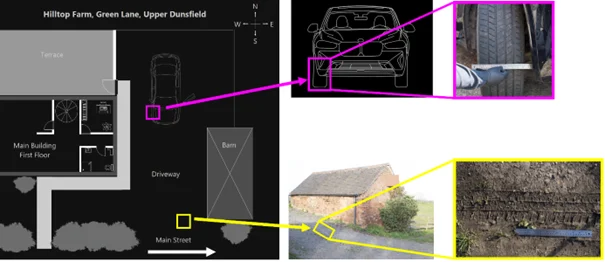
Let us consider a fictional crime scene where both footwear impressions and tire marks were recovered. Similar to our first example, we can use Amped FIVE’s annotation tools to combine the scene sketch with overview images and close-up photographs of the recovered traces. This combination, along with additional notes, provides investigators with a clear visual summary. It illustrates where each trace was found, how the traces relate to one another and to fixed features, the likely direction of travel, and which measurement references (such as scales and control points) will be used for subsequent analysis.
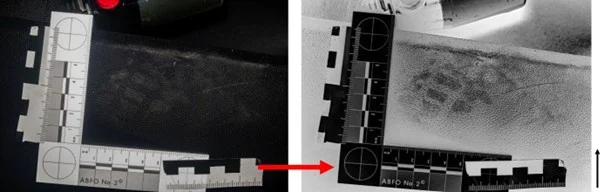
Let us examine the processing steps for the shoeprint fragment outlined in red, as shown in the finished processed image.
Footwear impressions, like fingermarks, should appear as dark marks on a light background in the final image.
Accordingly, the first step here is to invert the image’s tonal values; we then adjust local/detail contrast using the Smart Adjust filter and convert the image to greyscale.
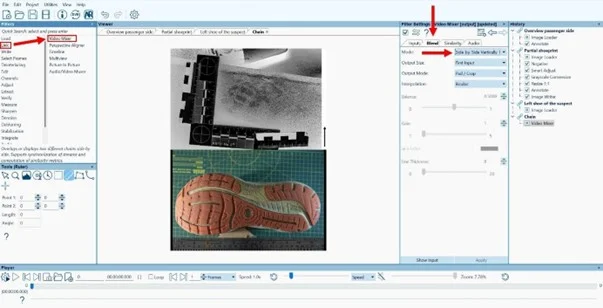
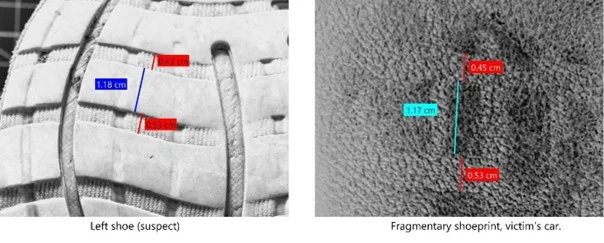
In the course of the investigation, a pair of shoes was seized from one of the suspects, which we want to compare with this shoeprint fragment. Amped FIVE offers, among other options, the ability to place two images side by side using the Video Mixer filter for a direct visual comparison.
Amped FIVE also provides the ability to perform precise measurements in images using the Measure 1D filter, allowing details in two different images to be compared. This requires a reference length within the image. In our case, we can define it using the forensic scales visible in the images and then perform the measurements.
Let us take another closer look at the Measure 1D filter using the tire marks that were recovered at the scene.
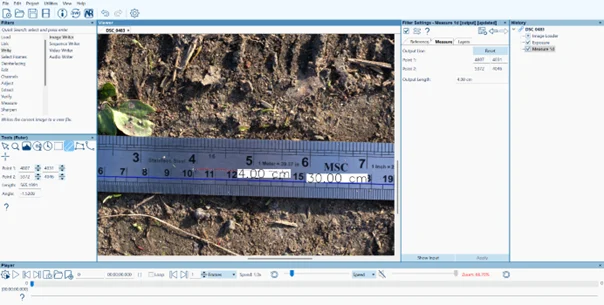
A tire mark was identified in the property’s driveway. To rule out the victim’s vehicle as the source, we compare the width of the mark with the width of the tires on the victim’s vehicle. Within this filter, we first need to define our reference length.
To achieve this, we draw a line along the visible scale in the image, making it as long as possible, in this case, 30 cm. We then enter this value into the “Reference Length” field in the Filter Settings panel, specifying centimeters as the unit.
As a quick test, I measured a segment along the scale, from 10 to 14 centimeters, and the filter correctly confirmed the distance as 4 centimeters.
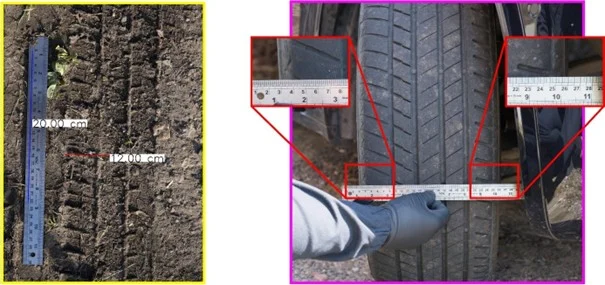
Now we can measure the width of the tire mark. This method is precise and also non-destructive, as it is contact-free and we did not have to place a physical scale into the mark at the scene. After rotating the image 90 degrees clockwise to make the comparison a little easier, we can again use the Annotate filter to set out, side by side, the measurement of the tire-mark width and the measurement of the tire width from the victim’s vehicle. The Annotate filter’s magnifying tool is also very helpful here. It allows regions to be enlarged quickly and efficiently and creates a picture-in-picture effect.
Conclusion
Impression evidence like fingermarks, footwear impressions, and tire marks offers substantial probative value when captured, processed, and reported in a coherent, documented manner. Proper scene photography and visualisation, followed by a transparent and reproducible image enhancement workflow, support both situational reconstruction and comparative assessment. Amped FIVE provides an efficient environment for this workflow – from tonal adjustments through channel selection, frequency-based suppression, and background subtraction to calibrated measurement and clear, annotated exhibit panels suitable for the report – while preserving the integrity of the original files.
Category: Advertorial
Advertisement
Job of the week
DEPUTY COMMISSIONER OF POLICE
- Royal Cayman Islands Police Service
- Cayman Islands
- CI $121,356.00 – $155,316.00 per annum
The Deputy Commissioner of Police provides strategic leadership in support of the Commissioner of Police to ensure the effective management, direction, and oversight of the Royal Cayman Islands Police Service (RCIPS). The role is critical to advancing national security, enhancing public safety, and sustaining public trust across the Cayman Islands. The post holder is responsible for leading the development and execution of policing strategies, overseeing operational and organisational performance, and ensuring compliance with legal, ethical, and professional standards. The Deputy Commissioner also serves as the principal liaison with government entities, community stakeholders, and international partners, and assumes full command responsibilities in the absence of the Commissioner.
Read moreCoffee break